|
Este tutorial estŠ hecho para Adobe Photoshop. Pero puedes seguirlo con otro
programa similar :)
This tutorial is made for Adobe
Photoshop (in Spanish, sorry for the mistakes ._.), but you should be able to
follow it in other similar program.
|
|
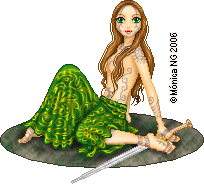 |
Vamos a hacer esta falda bordada.
We are going to do this embroidered skirt . |
|
 |
|
|
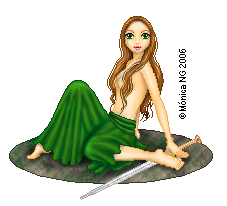
Con el vestido ya terminado, crea una nueva capa llamada: "oro". (o como tu quieras :p) El vestido no debe tener mucho detalle; le daremos mejor los brillos con el bordado de oro ^^
With the dress already finished,
it creates a new layer called: "gold". (or as your you want :p)
The dress must not have much
detail; we will give it better the brightness with the gold embroidering ^^
|
|
 |
|
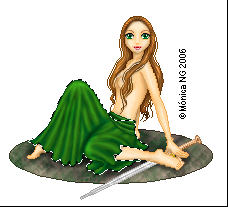 |
Selecionamos el exterior de la falda con la varita mŠgica.
 AsŪ evitaremos salirnos fuera y que el .gif quede mal cuando dibujemos el motivo ^^ AsŪ evitaremos salirnos fuera y que el .gif quede mal cuando dibujemos el motivo ^^
Select the outside of the skirt with the magic wand.
 Thus we will avoid to leave to us was and that.GIF
is bad, when we draw the reason ^^ Thus we will avoid to leave to us was and that.GIF
is bad, when we draw the reason ^^ |
|
 |
|

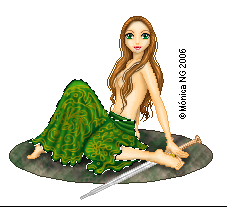 |
He hecho este diseŮo. Lo he copiado fuera para que podŠis apreciar los motivos. Como es una doll de inspiraciůn celta-fantŠstica, vamos a dibujar algunas flores, hojas de junquillo, un
detalle de una luna, algun triskel por ahi y un pequeŮo dragůn por encima.
Para ello usaremos la
herramienta pincel.

Grosor: 1px, opacidad: 100%
Vamos a intentar con ello que nos quede difuminado, para darle mŠs realismo.
I have made this design. I have
copied it outside so that you prune to appreciate the details. As the doll
is celtic-fantastic inspiration, we are going to draw some flowers, leaves,
a detail of a moon, some triskel and a small dragon.
For it we will use the paintbrush.
 Thickness: 1px, opacity: 100% We are going to try with it that
to us is stumped, in order to give it more realism. Thickness: 1px, opacity: 100% We are going to try with it that
to us is stumped, in order to give it more realism.
|
|
 |
|
|
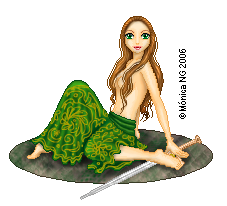
Ahora podťis ver el motivo sobre la falda ^^
Now you can see the motive on the
skirt ^^
|
|
 |
|
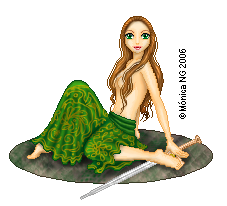 |
Vamos a proceder a sombrear el bordado, con la
herramienta subexponer.

Nos vamos a guiar con la sombra de los pliegues de la falda. Recuerda no dejarlo muy oscuro para que el bordado no se pierda del todo.
Para los pliegues usaremos primero un sombreado con el rango en "medios tonos"

Exposiciůn: 60%
We are going to come to shade the embroidering,
with the burn tool 
We are going away to guide with the shade of you fold them of the skirt.
Remember: not to leave it very dark so that the embroidering is not lost
absolutely.
For you fold them we will use first shaded with the "halftone" rank

Exp: 60%
|
|
 |
|
|
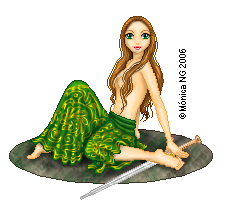
Para los brillos utilizaremos la herramienta sobreexponer.

En rango "Iluminaciones".
Recuerda, este rango es el que hay que utilizar para darle el brillo al oro.

Exposiciůn: 70%
ŅA que ahora parece que tiene volumen? :)
For the brightness we will use the dodge tool.

In rank "Iluminations". It remembers, this rank is
the one that there is to use to give the brightness to gold.

Exp: 70%
To that now it seems that has volume? :)
|
|
 |
|
|
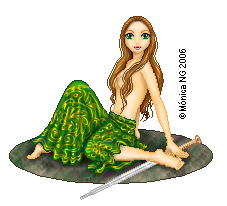
Terminamos de dar detalles a otras partes del vestido,
como ese fajŪn que hicimos antes.
We'll finish giving details to other parts of the dress, like that band that we did before. |
|
 |
|
|
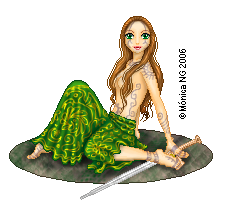
Con la misma tťcnica esta vez hacemos unos tatuajes
sobre la piel con color azul. Esta vez ponemos el motivo con una
opacidad de 40%
With the same technique this time we make tattoos on the skin with blue color. This time we put the drawing with a 40% opacity |
|
 |
|
|
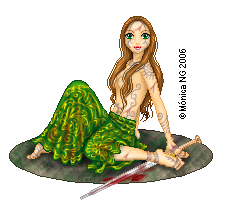
(opcional) Ahora, de manera opcional, podemos aŮadirle
y poquito de sangre a la falda, con la herrameinta pincel y un color granate
oscuro, poco a poco, con una opacidad de 12% y cada vez pasando el pincel
mŠs por encima, para que parezca que estť goteando :p
(optional) Now, of optional way,
we can add and bit of blood to the skirt, with paintbrush tool and a dark
garnet color, little by little, with an opacity of 12% and every time paint
the brush more superficially, so that it seems that it is dripping :p
|
|
 |
|
 |
Bieeen!!! acabamos de terminar la doll!!!
Ahora un consejo: esto que te he explicado es ķtil con el dorado, pero para
el plateado debes tener mŠs cuidado. Sobre todo si es en fondo claro, o
perderŠs el dibujo :)
yay! we finished the doll!!!!
Now an advice: this that I have explained to you is
useful with the golden one, but for the silver one you must be more careful.
Mainly if it is in pale bottom or you will lose the drawing:)
|
|
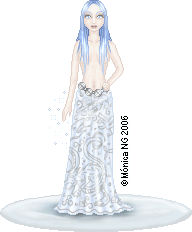
Mira otras dolls con siguiendo esta tťcnica. Puedes usar todos los colores que
quieras.
Look other dolls with following this technique. You can
use all the colors that you want.

Espero que este tutorial te haya sido de ayuda ^^. Si te ha gustado y lo
sigues, no dudes en hacerme link para que otras personas tambiťn puedan
visitarlo! :)
I hope that this tutorial has been helped you ^^. If you liked it and you follow it, you don't doubt in
linking me so that other people also can visit it! :)
|
|
|
